First Stream
Use this tutorial after installing Fluxomni Studio to create a protected operator account, accept one RTMP stream, send it to one destination, and confirm that it is live.
Before you begin
You need a running single-host installation and an encoder that can publish RTMP, such as OBS or FFmpeg. Open http://<your-server-ip>/routes in a browser.
This tutorial uses the default single-host media node. If you are deploying behind a domain or reverse proxy, configure the public host values first so generated ingest and playback URLs are usable. See Configuration and Reverse Proxy & TLS.
Create the first operator account
A new installation can initially open as an Open shell. Create a named account before using the instance for production:
- In the sidebar, open Settings, then Users.
- Enter a username, optional display name, and a strong password.
- Select Create user.
The first persisted user becomes an Admin and enables named-user sign-in. Keep the credentials in your password manager. For the full account and role model, see Settings.
Create an RTMP route
- In the sidebar, open Routes and select + New Route.
- Enter a route label, such as
Main broadcast. - Under Primary Live Source, choose RTMP and Accept publish.
- Select Create route.
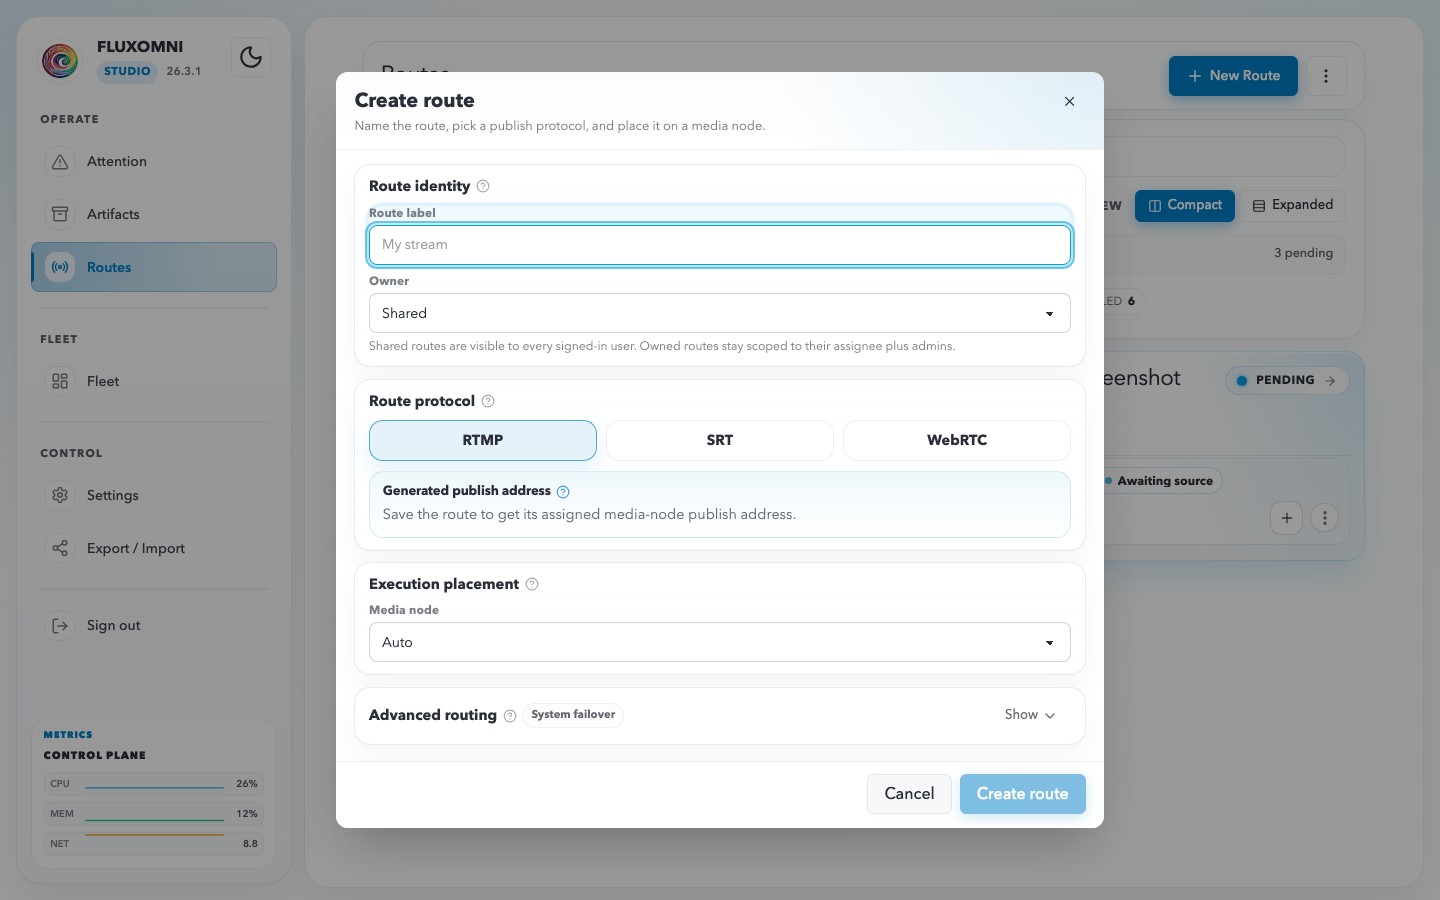
After Fluxomni Studio assigns the route to its media node, open the route workspace. In Routing, use the copy control in the input lane to copy the generated RTMP publish address.
Publish from OBS
Open the route workspace and copy the publish URL from Sources → Live Sources. For SRT or WebRTC, create the route with that protocol and Accept publish instead of RTMP. Use the copied URL, including any nonstandard port; an unavailable URL means the route or media node is not ready to accept that protocol.
RTMP
In OBS, open Settings → Stream and select Service: Custom. Split the copied URL at the final /:
- Copied URL:
rtmp://media.example.com:1935/live/pk_example - Server:
rtmp://media.example.com:1935/live - Stream Key:
pk_example
Use H.264 video and AAC audio, select Apply, then Start Streaming.
SRT
In Settings → Stream, select Service: Custom, paste the complete copied SRT URL into Server, and leave Stream Key empty. Keep the streamid and any latency or passphrase parameters intact. OBS connects in caller mode by default.
Use H.264 video and AAC audio, select Apply, then Start Streaming. See the official OBS SRT streaming guide.
WebRTC / WHIP
In Settings → Stream, select Service: WHIP and paste the complete copied HTTP WHIP URL into Server, for example:
http://media.example.com:8003/rtc/v1/whip/?app=live&stream=pk_example
Leave Bearer Token empty: Fluxomni includes the publishing credential in the URL’s stream parameter. Use H.264 video and Opus audio, select Apply, then Start Streaming.
Choose WHIP, not Custom: pasting this HTTP URL into Custom leaves OBS using RTMP and causes a handshake failure. If WHIP is missing, use an OBS build that supports it. See the official OBS WHIP streaming guide.
WHIP requires a media node with public gateway support. Both signaling TCP (default 8003) and RTC media UDP (default 8000) must be reachable from OBS, and the node must advertise a reachable ICE candidate. Use your deployment’s actual ports; reaching the web UI alone does not establish media connectivity.
Confirm publishing
The source should become live and the route monitor should show your media. If OBS reports Failed to connect to server, check the selected service, copied address, and reachable protocol ports. Keep publish URLs private: they authorize publishing to the route. For other encoders, use the same copied endpoint with the matching publishing protocol. See Troubleshooting.
Add one output
- In the route workspace, open Routing and select + Add output.
- Paste the destination URL supplied by your streaming platform.
- Optionally add a label that identifies the destination.
- Save the output.
A real platform destination can begin receiving the stream as soon as the encoder publishes. Confirm the selected destination and its stream key before you start the encoder.
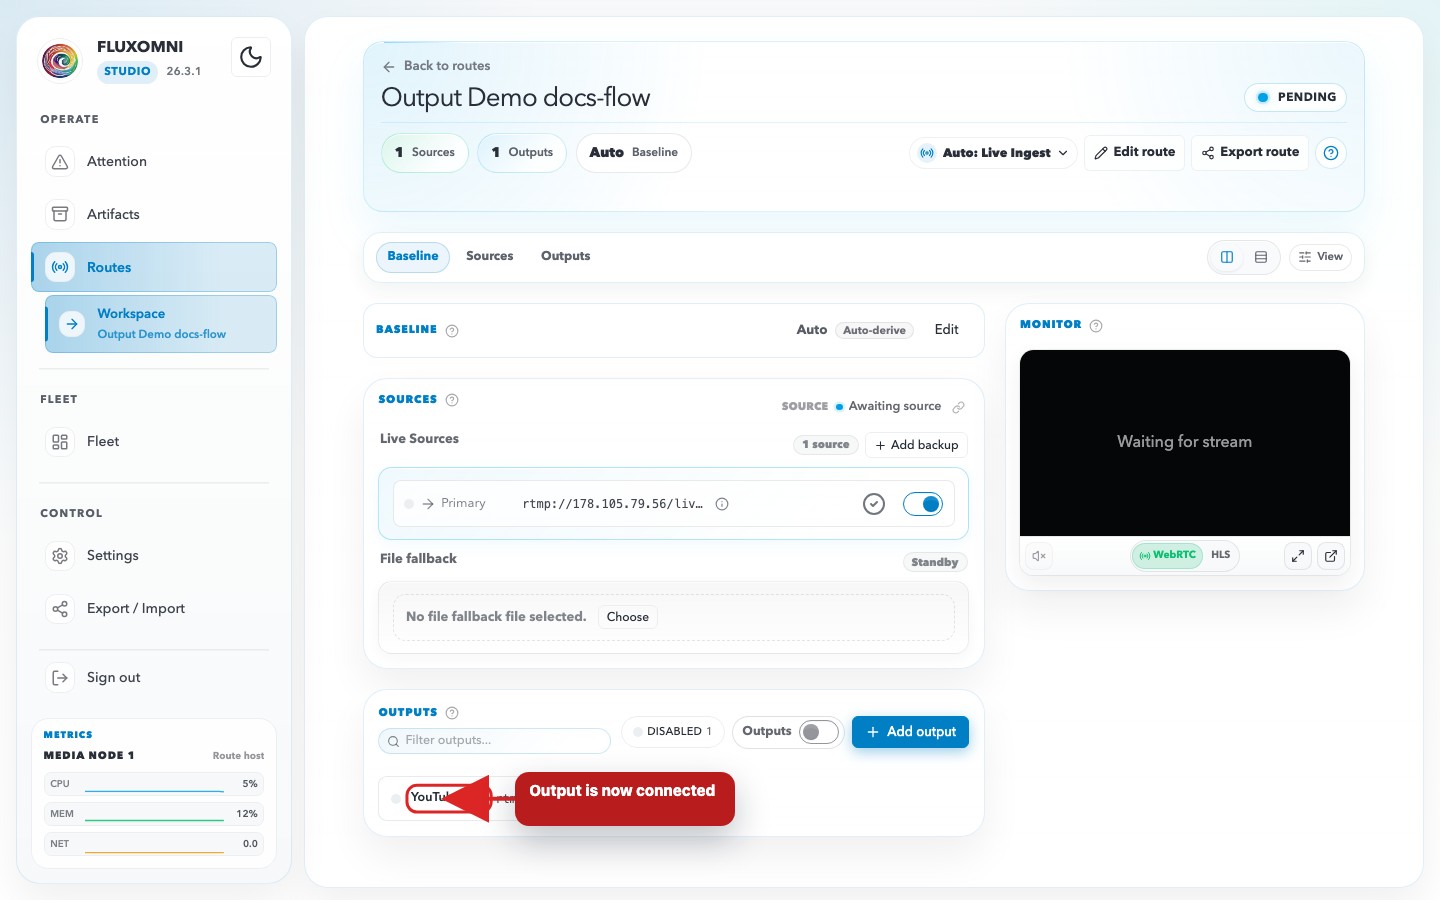
Fluxomni Studio supports RTMP/RTMPS, SRT, Icecast, and file output destinations. Use an RTMP or RTMPS destination for a typical streaming platform.
Verify the stream
Confirm all of the following before relying on the route:
- The route header shows LIVE.
- The Live playback panel shows LIVE and the expected outgoing stream when a playback URL is available.
- The destination has received the expected stream.
- Attention has no active Critical alert for the route or its media node.
The Routes guide explains the workspace, output states, preview, playlists, and route-level alerts in more detail.
Protect your configuration
Create a backup after this first successful stream. From the install directory, stop the stack, archive data/ and .env, then start the stack again as described in Backup & Restore.
Next steps
- Routes — add backups, playlists, and more outputs
- Reverse Proxy & TLS — serve the operator UI securely on a domain
- Monitoring — monitor route and media-node health
- Backup & Restore — establish a regular backup routine